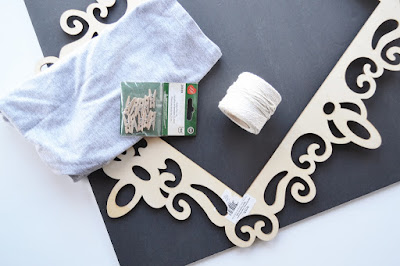
Supplies:
Art Minds laser cut wood frame
fabric
foam core board
string
mini clothes pins
spray adhesive
glue gun
1. Stain the frame
2. Cut two pieces of foam board for back. I use foam core board all the time for projects because it's super cheap and light weight.
3. Spray adhesive on one side of one foam board and attach fabric. Cut the fabric a little larger so the edges can wrap around the sides.
4. Glue other foam board onto back of fabric board This is to cover the edges of fabric and give it a more clean, finished look.
5. Hot glue strings on back side of wood frame.
6. Attach fabric covered foam boards to back of wood frame with hot glue.
This board is going on the wall behind my computer desk! I can look at beautiful photos of my kids while I work and now I have a place to put my lists and notes so I won't loose them.
Thank you so much for visiting my blog!
I will be sharing with these great blogs!
Follow me here:


I am always looking for some place to stick my notes while working. And this Message Board is a good idea. I can just hang my note with a clip on the string.
ReplyDeleteLovely message board Laura - thank you for sharing to Pin Worthy Wednesday.
ReplyDeleteThis is very clever and cute too! Thanks for Sharing at Thursday Favorite Things!
ReplyDeleteI too see these frames in the stores and have no idea where to put it or how to use it. So you've given me a great idea. It turned out really pretty! Visiting from Made By You Monday party.
ReplyDeleteI too had one of those awful memo board, and I added burlap and riibbon to mine. Yours on the other had has turned into a work of art! Pinned!
ReplyDeleteThanks Laura for sharing your pretty message board with us at Cooking and Crafting with J & J!
ReplyDeleteSuper cute idea, I'm pretty sure I have a few of these laser cut frames laying around as well! Thanks for sharing at Merry Monday!
ReplyDeleteThis is super cute! Love it!
ReplyDeleteI would LOVE for you join and share this at my DIY and Recipes FB Group: https://www.facebook.com/groups/pluckyrecipescraftstips
Thanks for joining Cooking and Crafting with J & J!