Wednesday, May 22, 2013

Orange Dark Chocolate Brownies

Orange Dark Chocolate Brownies

This easy recipe uses a brownie mix and concentrated OJ to make one of my favorite flavor combinations.


Duncan Hines Dark Chocolate Brownie Mix
1/3 c. water
1/3 c. veg oil
2 eggs
2 Tbsp. orange juice concentrate
zest of one orange

Just follow the instructions on the box for cake-like brownies. I measured out the 2 Tbsp of OJ concentrate into the measuring cup and then added the water up to 1/3, so it ends up being slightly less than 1/3 c. of water. Since I live at high altitude, I also added 2 Tbsp of flour to my mix. Mix together all ingredients and place in greased pan. Bake for time recommended on box for your pan size.

Thursday, May 9, 2013

Refrigerator Liners

Keep Your Refrigerator Cleaner!

While hanging out online, I came across these things called Fridge Coasters. The idea is pretty cool since I HATE cleaning my refrigerator. They are absorbent, stylish...blah, blah. If you have glass shelves, you can easily wipe up any spills, so I don't really see the point of putting an easy to clean liner on top of an already easy to clean surface. However, I am interested in anything to help keeping those shelves on the door clean. All the condiment bottles drip and my shelves get disgusting! I feel a trip to the dollar store coming...


One roll of rubber shelf liner, and now my fridge has some style and is sparkly clean! When it gets dirty again I will just remove my $1 liners and soak the yuck off in a sink of warm water.


Tuesday, May 7, 2013

Reclaimed Window Into A Frame

Create a unique wall hanging with an old window

I saw this idea and not a week later the neighbors were replacing all their windows and put the old ones out on the curb...lucky day!!!

Turn a reclaimed window into a decorative frame by Over The Apple Tree

Turn a reclaimed window into a decorative frame by Over The Apple TreeTurn a reclaimed window into a decorative frame by Over The Apple Tree


Turn a reclaimed window into a decorative frame by Over The Apple Tree

What I used to make this project

  • Old window
  • crackle paint
  • frosted glass spray 
  • cardboard
  • black fabric
  • spray adhesive
  • picture hanging kit
  • duct tape
First, use tape and newspaper to protect glass and paint window frame. I used a crackle paint kit. Next, using masking tape and newspaper, cover frame and area of glass where you do not want the frost spray.


Using sturdy cardboard, cut it to fit inside frame over glass panes. In order for the cardboard to fit tightly into the frame, I scraped out some of the caulking on the back side of window around the glass. Cut fabric to fit over cardboard and attach using the spray adhesive.


Attach the picture frame hanging kit.


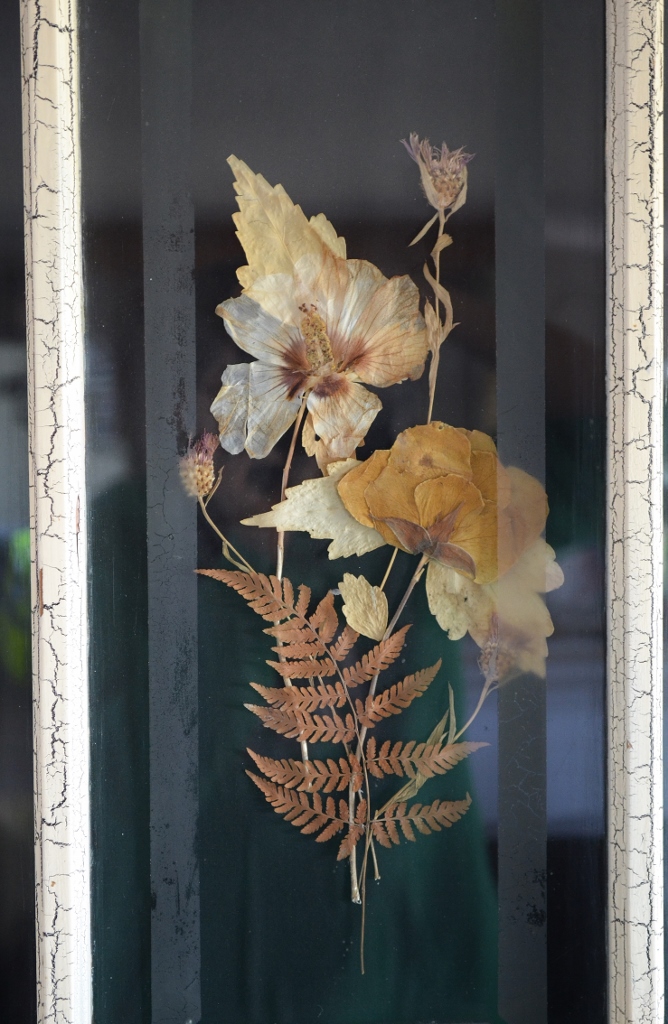
I chose to display dried flowers in my frame, but you could put anything(pictures or antique handkerchiefs would be good too). Secure the cardboard panels with the duct tape.


 I know there might be better ways to put this together that may be more secure, but I made this over ten years ago and it's still in good shape hanging on my wall. Good Luck!

Turn a reclaimed window into a decorative frame by Over The Apple Tree

Turn a reclaimed window into a decorative frame by Over The Apple Tree


Looking for more unique wall decor? Check out my Family Love Tree Carving!

Thank you so much for visiting my blog!
Project Gallery

I will be sharing with these great blogs!

Follow me here:

Wednesday, May 1, 2013

My Granola Bars...Supercharged!

Does your family love healthy snacks and you've always wanted to make your own? My granola bar recipe is a great place to start!

Make your own granola bars by Over the Apple Tree

I followed my original granola bar recipe except I substituted the one cup chocolate chips and one cup coconut for two cups of assorted healthy goodies. The bars pictures above have chopped dried cranberries, dark chocolate, flax seed, sesame seed, coconut flakes, and chopped almonds. I think this combo is my new favorite so far, but the possibilities are endless.

Thank you so much for visiting my blog!
Project Gallery

I will be sharing with these great blogs!

Follow me here:

Monday, April 22, 2013

Creative Patches For Kid's Jeans

How To Make Kid's Jeans Last A Little Longer

If you have kids, you know what they do to their jeans and how the cost of new clothes can add up. Here are a couple cute ideas to stretch the life of those "ruined" pants.

Monster Mouth
The first idea is one I've seen floating around Pinterest and worked well with my son's pants that had a huge hole. Of course it started as a small rip and throughout the course of the day at school, he made it worse. These were really cool, distressed jeans that fit great and I hated to have to throw them out, so we tried the monster face. I used some scrap red fabric for the inside of the mouth and white felt for the eyes and teeth. Just cut red fabric a little bigger than the size of the hole and with the teeth, attach to inside of jeans with sewing machine. This took a little finesse, good thing these pants were baggy! Next cut circles for eyes and sew those on as well. My son thinks these are so cool and yippee, pants have been saved!


Flower Child
The hole in my daughter's pants was caught early, so it was still pretty small. I got a twill iron-on patch from Walmart's craft department. I wanted to style it up a bit so, after we decided on flowers, I cut one big enough to cover the hole. Before ironing on, I used yellow thread in the sewing machine and went back and forth to make a yellow center for our flower. Then I used pink thread and stitched around the edge of flower.
I also cut out two additional flowers, just to even out the look on the other side and ironed on. These pants still fit in the waist but were starting to get a little short so, I just attached some lace and ribbon to the bottom cuff. This added the length we needed and looks really cute. 


Super Star
Another hole, of course. It was bound to happen with these ones, the denim was so thin. I got another iron-on patch and this time, cut out stars. Of course, just the knees needed to be done but why not go all out? After I ironed on, I went around the edges with some dimensional glitter craft paint. Afterward I wished I had done it with silver, but gold is what I already had in the house and seriously, a four year old doesn't really care what color the glitter is.


Thank you so much for visiting my blog!
Project Gallery

I will be sharing with these great blogs!


Follow me here:
Related Posts Plugin for WordPress, Blogger...